我使用的Intel RealSense 硬件:F200、SR300 和 R200 摄像头 都可以
Intel RealSense SDK:intel_rs_sdk_offline_package_10.0.26.0396(安装教程这里 )
电脑系统:Windows 10 64位
编程语言:C++
开发工具软件:Visual Studio 2010 (安装教程这里 )
参考程序所在路径:C:\Program Files (x86)\Intel\RSSDK\sample\DF_CameraViewer\src\camera_viewer.cpp
示例程序官方文档使用说明:C:\Program Files (x86)\Intel\RSSDK\doc\CHM\sdkmanual-essential.chm -> Sample: DF_CameraViewer [C++]
DF_ 指的是什么(在我写的:介绍F200、SR300 和 R200 摄像头 的博文里面已经有讲过了。)这里直接截个图。
注意: Intel RealSense 模块使用时间长了发热会很严重。不要开启太长的时间,并且注意使用散热片散热
在命令行中的使用方法
1
2
DF_CameraViewer [-load <module name>] [-sdname <device name>]
[-csize <resolution>] [-dsize <resolution>] [-file <Output Filename>] [-listio] [-record] [-help]
Col1
Col2
Col3
-load
明确加载指定模块(如果你的电脑上连接了两个Intel RealSense模块,使用这个参数就可以明确指定你要使用哪一个模块)
field3
-csize
指定彩色流分辨率和帧速率。 例如,使用640x480指定分辨率,或使用640x480x30指定分辨率和帧速率。
DF_CameraViewer -csize 640x480x30 或者 DF_CameraViewer -csize 640x480
-dsize
指定深度流分辨率和帧速率。 例如,使用640x480指定分辨率,或使用640x480x30指定分辨率和帧速率。
DF_CameraViewer -dsize 640x480x30 或者 DF_CameraViewer -dsize 640x480
-sdname
指定一个输入设备名称
-nframes
指定要显示的最大帧数。就是刷新多少次显示的图片。比如设置为200,那么帧数刷新200次,程序自动结束。
DF_CameraViewer –nframes 200
-listio
列出I/O 设备列表
-record
启用文件记录。 如果使用这个参数,就必须要还要使用-file参数指定记录文件名
-file
录像或者播放指定文件名。 如果未指定-record,则程序将播放指定的文件。 否则,示例将摄像机数据记录到指定的文件。 (注意:指定的路径一定要有可写的权限。)
-help
输出帮助信息
1
2
3
4
5
6
7
8
9
10
11
12
13
>DF_CameraViewer -help
Usage: [options]
-csize 640x480x30             Set the source device color resolution and frame rate
-dsize 320x240x60             Set the source device depth resolution and frame rate
-isize 640x480x30             Set the source device IR resolution and frame rate
-file FILENAME                Specify playback (or recording) file
-record                       Use together with -file to enable recording
-nframes 350                  Record specific number of frames then exit
-sdname Integrated            Specify the source device by its partial name
-listio                       List all I/O devices
-noRender                     Disable rendering of all streams
-mirror                       Enable MIRROR_MODE_HORIZONTAL
-help                         This help
在命令行中运行程序
下面简单的使用几个命令,来通过实战了解各个参数的作用。
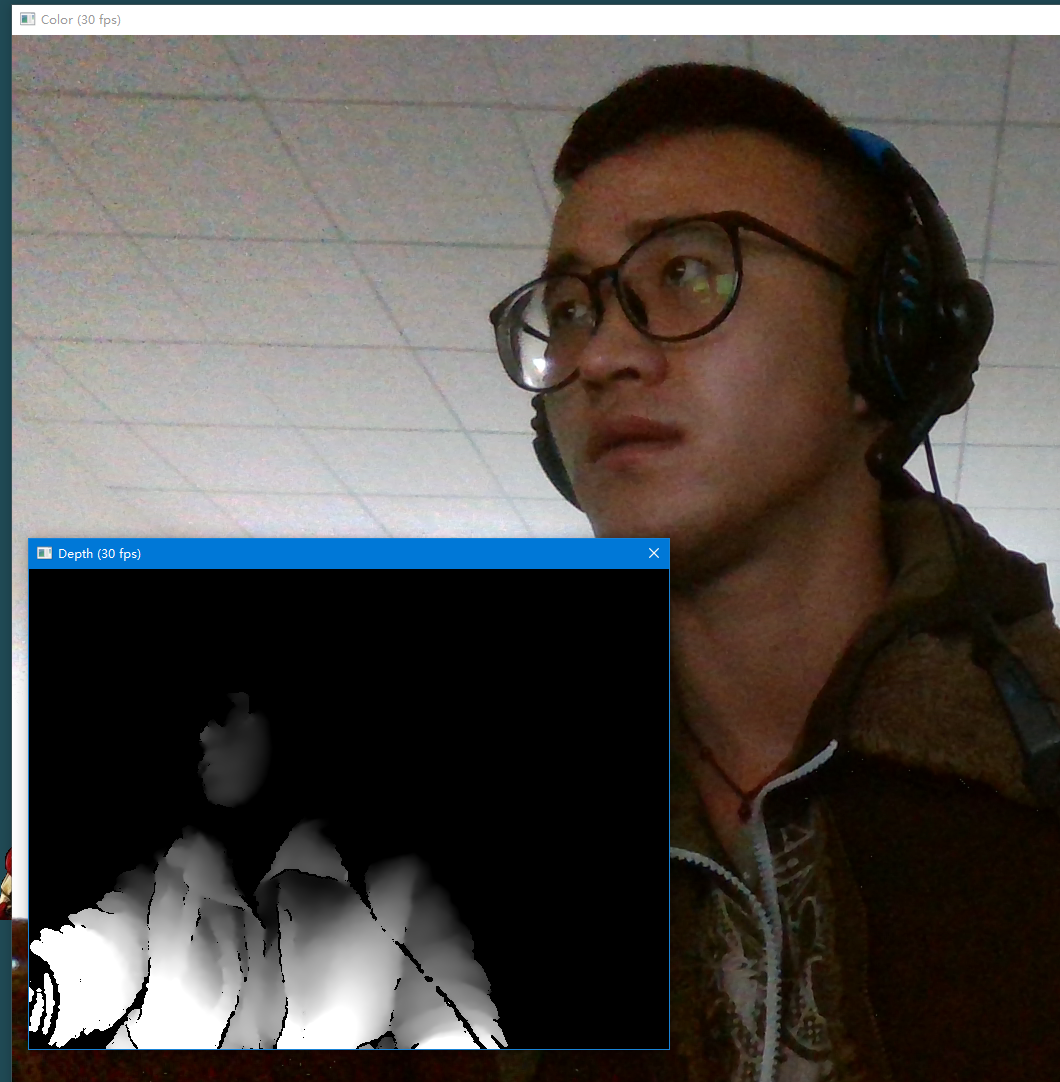
默认输出两个图片,一个是彩色图片(1080p),一个是深度图片(640x480)。(彩色图片太大了,这里只截了一半的图)
1
2
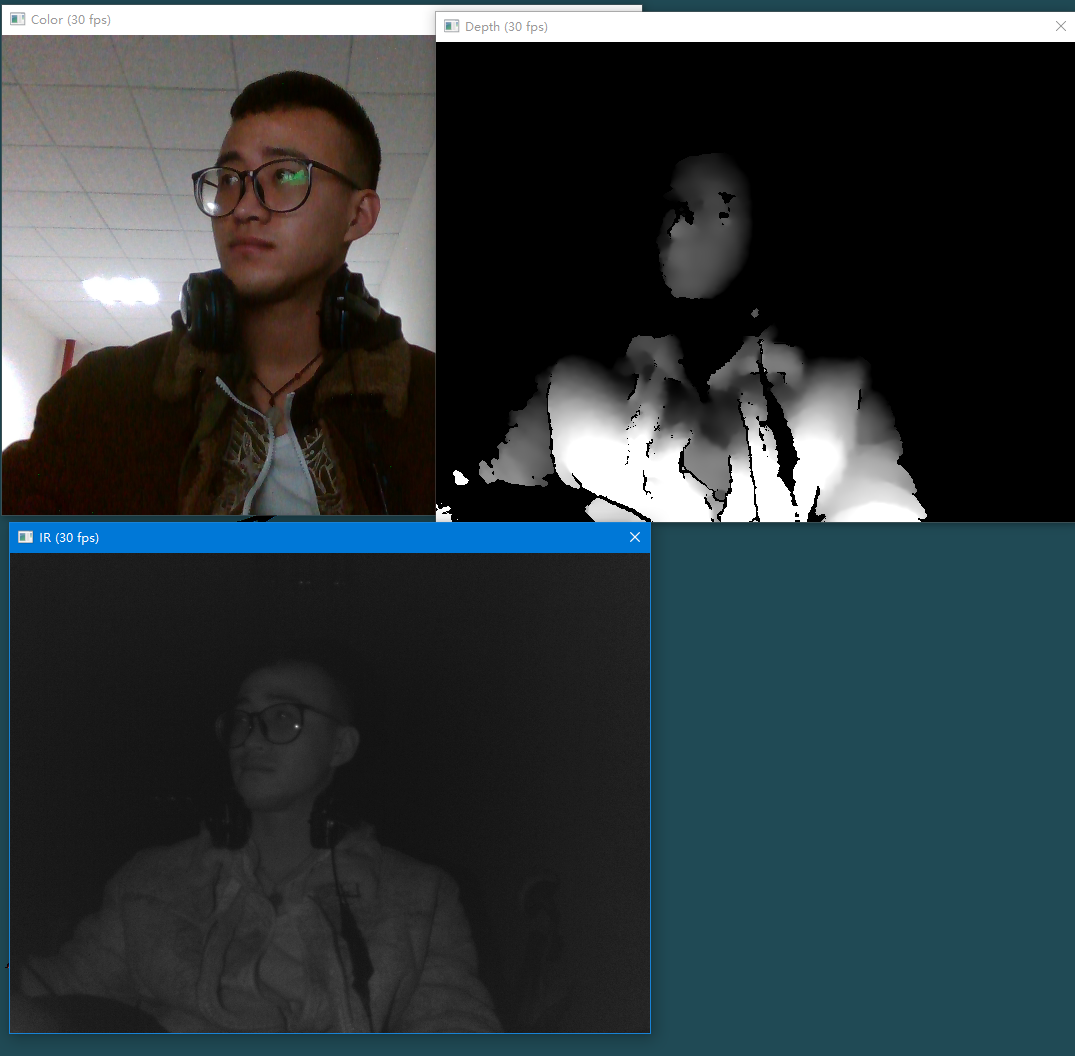
>DF_CameraViewer.exe -csize 640x480 -dsize 640x480 -isize 640x480
(注意:640x480, 使用的是字母 x )
输出三个图片:彩色图片、深度图片、红外线图片
1
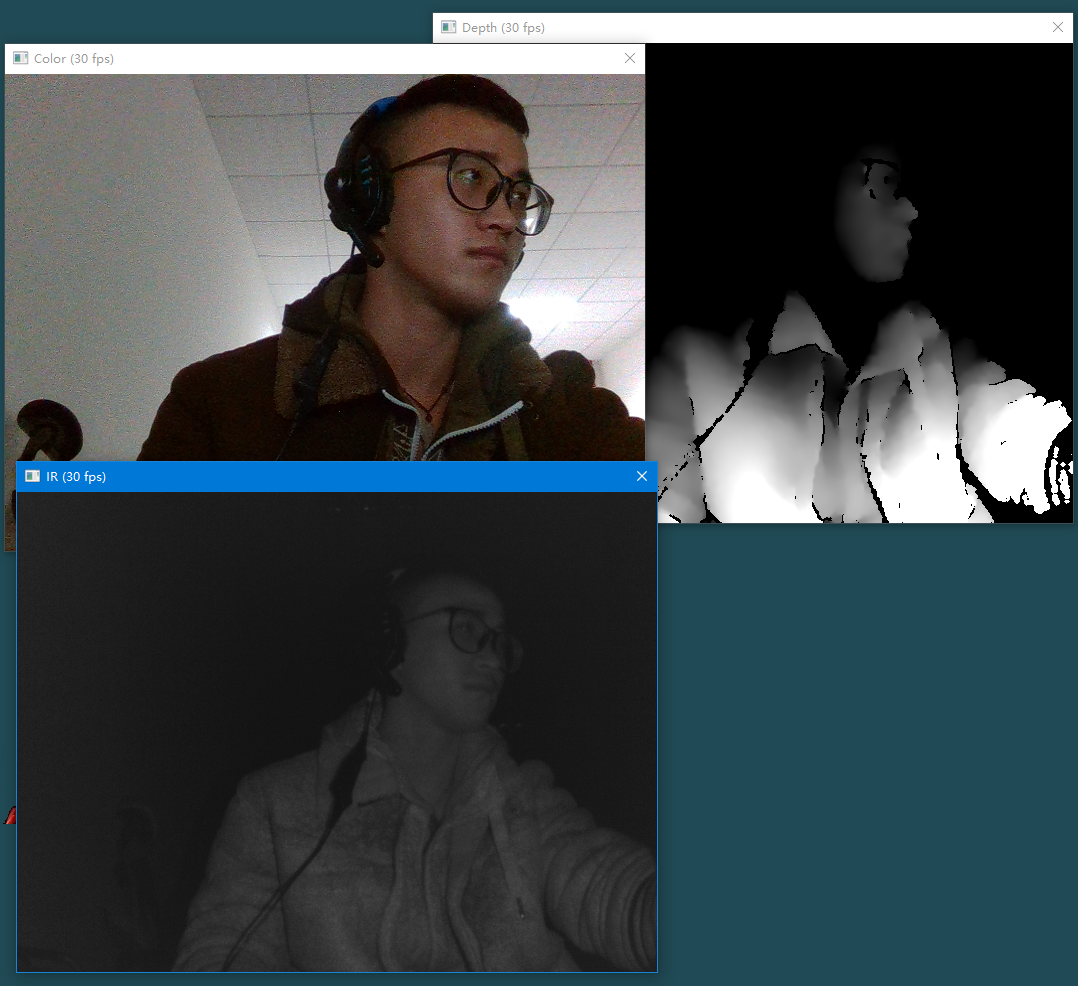
>DF_CameraViewer.exe -csize 640x480 -dsize 640x480 -isize 640x480 -mirror
输出的是镜面图像。
讲解程序
DF_CameraViewer 示例是一个简单的C ++控制台应用程序 。从这个示例程序,我们可以学到:如何从 Intel RealSense模块 以数据流的形式获取彩色图像和深度图像(或者其他图像) 。
1 . 创建了一个PXCSenseManager(RealSense管理器)类的实例化对象:
1
PXCSenseManager * pp = PXCSenseManager :: CreateInstance ();
注:
Intel的RealSense SDK 的C++的:接口全部携带“PXC”前缀、 顶层枚举器全部携带“pxc”前缀、实用程序类全部携带“Util”前缀。
Intel RealSense SDK C#使用类似的前缀方案,但在末尾加一个“M”(代表“管理”的意思):接口携带“PXCM”前缀、 顶层枚举器携带“pxcm”前缀、实用程序类携带“UtilM”前缀。
如果你在网上搜索资料时看到:"PXC[M]“, "pxc[m]” 和 “Util[M]",这表示这个资料是C++ 和 C#都可以使用的资料。里面使用"PXC[M]”, “pxc[m]” 和 “Util[M]” 标注的接口和函数,如果替换成 “PXC”、“pxc” 和 “Util”,那么就是C++程序;反之,如果替换成“PXCM”、“pxcm” 和 “UtilM”,那么就是C#程序。
“PXC” 是全称是:?2016-12-13 07:01:17 https://software.intel.com/en-us/forums/realsense/topic/601434 这个我还不太清楚,应该是:Perceptual eXperience Coding
2 . 程序接下来,检查是否pp这个对象是否创建成功:(这个就是一个检测类的实例化对象是否创建成功的代码。电脑不插Intel RealSense模块, 这段代码也可以正常执行。)
1
2
3
4
if ( ! pp ) {
wprintf_s ( L"Unable to create the SenseManager \n " );
return 3 ;
}
获取命令行参数:
1
2
3
4
5
UtilCmdLine cmdl ( pp -> QuerySession ());
if ( ! cmdl . Parse ( L"-listio-nframes-sdname-csize-dsize-isize-lsize-rsize-file-record-noRender-mirror" , argc , argv )){
system ( "pause" );
return 3 ;
}
其中QuerySession()方法返回的是一个Session类的实例化对象。
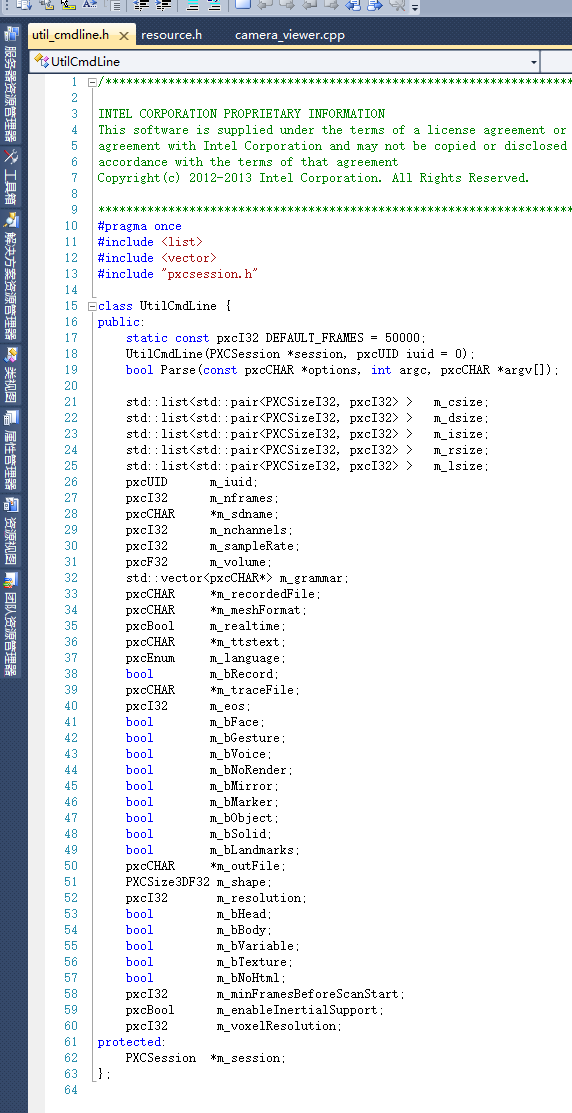
UtilCmdLine 这个类里面的Parse()方法会自动将-listio-nframes-sdname-csize-dsize-isize-lsize-rsize-file-record-noRender-mirror这一长串的字符串还有命令行参入的参数转换为一些数值,然后分配给UtilCmdLine类里面的一些变量:(util_cmdline.h文件所在路径: C:\Program Files (x86)\Intel\RSSDK\sample\common\include)
注意:这个QuerySession()方法返回的Session实例化对象(pp->QuerySession())是存储在PXCSenseManager类(就是pp这个实例化对象)里面的,所以,你不可以手动释放它(pp->QuerySession())。
3 .
1
2
3
4
/* Sets file recording or playback */
PXCCaptureManager * cm = pp -> QueryCaptureManager ();
cm -> SetFileName ( cmdl . m_recordedFile , cmdl . m_bRecord );
if ( cmdl . m_sdname ) cm -> FilterByDeviceInfo ( cmdl . m_sdname , 0 , 0 );
定义了一个PXCCaptureManager(捕获管理器)对象。
来到cmdl.m_recordedFile这个路径(如果你没有在命令行中指定-file参数,那么这段代码执行没有什么效果。第二个参数cmdl.m_bRecord,判断是播放还是录制。)
如果在命令行中指定了-sdname参数,那么就在这里设定使用指定的Intel RealSense设备。
4 .
创建了几个UtilRender类的实例对象。它们分别是:彩色图像显示流、深度图像显示流、红外激光显示流、右摄像头显示流、左摄像头显示流。
1
2
3
// Create stream renders
UtilRender renderc ( L"Color" ), renderd ( L"Depth" ), renderi ( L"IR" ), renderr ( L"Right" ), renderl ( L"Left" );
pxcStatus sts ;
注:C++的字符串前面的L的作用: L"我的字符串" 表示将ANSI字符串转换成unicode的字符串
5 .
接下来,根据命令行传入的参数进行相应的设置:
1
2
3
4
5
6
7
8
9
10
11
12
13
14
15
16
17
18
19
20
21
22
23
24
25
26
27
28
do {
/* Apply command line arguments */
pxcBool revert = false ;
if ( cmdl . m_csize . size () > 0 ) {
pp -> EnableStream ( PXCCapture :: STREAM_TYPE_COLOR , cmdl . m_csize . front (). first . width , cmdl . m_csize . front (). first . height , ( pxcF32 ) cmdl . m_csize . front (). second );
}
if ( cmdl . m_dsize . size () > 0 ) {
pp -> EnableStream ( PXCCapture :: STREAM_TYPE_DEPTH , cmdl . m_dsize . front (). first . width , cmdl . m_dsize . front (). first . height , ( pxcF32 ) cmdl . m_dsize . front (). second );
}
if ( cmdl . m_isize . size () > 0 ) {
pp -> EnableStream ( PXCCapture :: STREAM_TYPE_IR , cmdl . m_isize . front (). first . width , cmdl . m_isize . front (). first . height , ( pxcF32 ) cmdl . m_isize . front (). second );
}
if ( cmdl . m_rsize . size () > 0 ) {
pp -> EnableStream ( PXCCapture :: STREAM_TYPE_RIGHT , cmdl . m_rsize . front (). first . width , cmdl . m_rsize . front (). first . height , ( pxcF32 ) cmdl . m_rsize . front (). second );
}
if ( cmdl . m_lsize . size () > 0 ) {
pp -> EnableStream ( PXCCapture :: STREAM_TYPE_LEFT , cmdl . m_lsize . front (). first . width , cmdl . m_lsize . front (). first . height , ( pxcF32 ) cmdl . m_lsize . front (). second );
}
if ( cmdl . m_csize . size () == 0 && cmdl . m_dsize . size () == 0 && cmdl . m_isize . size () == 0 && cmdl . m_rsize . size () == 0 && cmdl . m_lsize . size () == 0 ) {
PXCVideoModule :: DataDesc desc = {};
if ( cm -> QueryCapture ()) {
cm -> QueryCapture () -> QueryDeviceInfo ( 0 , & desc . deviceInfo );
} else {
desc . deviceInfo . streams = PXCCapture :: STREAM_TYPE_COLOR | PXCCapture :: STREAM_TYPE_DEPTH ;
revert = true ;
}
pp -> EnableStreams ( & desc );
}
使能某个显示流显示窗口的方法是:pp->EnableStream()
如果你给上面的程序的每一个if判断语句内部添加上注释(像下面这样),然后再在命令行中使用命令运行程序。你就知道了,这些程序是怎么执行的了。
1
2
3
4
5
6
7
8
9
10
11
12
13
14
15
16
17
18
19
20
21
22
23
24
25
26
27
28
do {
/* Apply command line arguments */
pxcBool revert = false ;
printf ( "cmdl.m_csize.size() = %d \n " , cmdl . m_csize . size ());
if ( cmdl . m_csize . size () > 0 ) {
pp -> EnableStream ( PXCCapture :: STREAM_TYPE_COLOR , cmdl . m_csize . front (). first . width , cmdl . m_csize . front (). first . height , ( pxcF32 ) cmdl . m_csize . front (). second );
printf ( "cmdl.m_csize.front().first.width=%d, cmdl.m_csize.front().first.height=%d, cmdl.m_csize.front().second=%d \n " , cmdl . m_csize . front (). first . width , cmdl . m_csize . front (). first . height , cmdl . m_csize . front (). second );
}
printf ( "cmdl.m_dsize.size() = %d \n " , cmdl . m_dsize . size ());
if ( cmdl . m_dsize . size () > 0 ) {
pp -> EnableStream ( PXCCapture :: STREAM_TYPE_DEPTH , cmdl . m_dsize . front (). first . width , cmdl . m_dsize . front (). first . height , ( pxcF32 ) cmdl . m_dsize . front (). second );
printf ( "cmdl.m_dsize.front().first.width=%d, cmdl.m_dsize.front().first.height=%d, cmdl.m_dsize.front().second=%d \n " , cmdl . m_dsize . front (). first . width , cmdl . m_dsize . front (). first . height , cmdl . m_dsize . front (). second );
}
printf ( "cmdl.m_isize.size() = %d \n " , cmdl . m_isize . size ());
if ( cmdl . m_isize . size () > 0 ) {
pp -> EnableStream ( PXCCapture :: STREAM_TYPE_IR , cmdl . m_isize . front (). first . width , cmdl . m_isize . front (). first . height , ( pxcF32 ) cmdl . m_isize . front (). second );
printf ( "cmdl.m_isize.front().first.width=%d, cmdl.m_isize.front().first.height=%d, cmdl.m_isize.front().second=%d \n " , cmdl . m_isize . front (). first . width , cmdl . m_isize . front (). first . height , cmdl . m_isize . front (). second );
}
printf ( "cmdl.m_rsize.size() = %d \n " , cmdl . m_rsize . size ());
if ( cmdl . m_rsize . size () > 0 ) {
pp -> EnableStream ( PXCCapture :: STREAM_TYPE_RIGHT , cmdl . m_rsize . front (). first . width , cmdl . m_rsize . front (). first . height , ( pxcF32 ) cmdl . m_rsize . front (). second );
printf ( "cmdl.m_rsize.front().first.width=%d, cmdl.m_rsize.front().first.height=%d, cmdl.m_rsize.front().second=%d \n " , cmdl . m_rsize . front (). first . width , cmdl . m_rsize . front (). first . height , cmdl . m_rsize . front (). second );
}
printf ( "cmdl.m_lsize.size() = %d \n " , cmdl . m_lsize . size ());
if ( cmdl . m_lsize . size () > 0 ) {
pp -> EnableStream ( PXCCapture :: STREAM_TYPE_LEFT , cmdl . m_lsize . front (). first . width , cmdl . m_lsize . front (). first . height , ( pxcF32 ) cmdl . m_lsize . front (). second );
printf ( "cmdl.m_lsize.front().first.width=%d, cmdl.m_lsize.front().first.height=%d, cmdl.m_lsize.front().second=%d \n " , cmdl . m_lsize . front (). first . width , cmdl . m_lsize . front (). first . height , cmdl . m_lsize . front (). second );
}
如果有时程序秒退的话,你可以在return之前加上:system("pause");这样一段代码,让程序先暂停到这。
6 .
下面的代码是对命令行传入的 -mirror 参数进行处理:是否对图像进行镜像配置。
1
2
3
4
5
6
/* Set mirror mode */
if ( cmdl . m_bMirror ) {
device -> SetMirrorMode ( PXCCapture :: Device :: MirrorMode :: MIRROR_MODE_HORIZONTAL );
} else {
device -> SetMirrorMode ( PXCCapture :: Device :: MirrorMode :: MIRROR_MODE_DISABLED );
}
7 . 下面显示图片:
1
2
3
4
5
6
7
8
9
10
if ( cmdl . m_bNoRender == false ) {
const PXCCapture :: Sample * sample = pp -> QuerySample ();
if ( sample ) {
if ( sample -> depth && ! renderd . RenderFrame ( sample -> depth )) break ;
if ( sample -> color && ! renderc . RenderFrame ( sample -> color )) break ;
if ( sample -> ir && ! renderi . RenderFrame ( sample -> ir )) break ;
if ( sample -> right && ! renderr . RenderFrame ( sample -> right )) break ;
if ( sample -> left && ! renderl . RenderFrame ( sample -> left )) break ;
}
}
参考文献:C:\Program Files (x86)\Intel\RSSDK\doc\CHM\sdkmanual-essential.chm -> QuerySample
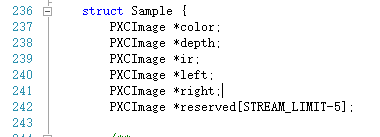
QuerySample()函数可以返回所有可能存在的图片样本。如果不给QuerySample()函数不传入任何形参,那么它将返回一个Sample结构体,这个结构体里面包含了所有的可能存在的图片样本。[ 可能存在的图片样本:depth(深度图像)、color(彩色图像)、ir(红外线图像)、right(右图像)、left(左图像)。] (下图就是Sample结构体其中一部分)
如果给QuerySample()函数传入一个指定的参数,那么它将只返回对应参数的图片样本。
如果你给QuerySample()函数传入一个参数,是你当前使用的Intel RealSense模块没有的设备,那么QuerySample()函数会返回NULL/null。( 比如说:我们当前使用的Intel RealSense模块是SR300,它没有right Camera 和 left Camera设备,所以如果你给QuerySample()函数传入sample->right 或者 sample->left参数,那么QuerySample()函数将返回NULL/null。R200版的Intel RealSense模块是具备right Camera 和 left Camera设备的,所以如果你当前使用的是R200,那么给QuerySample()函数传入sample->right 或者 sample->left参数,QuerySample()函数会返回sample->right 或者 sample->left对应的图片样本。)
上面的代码中,类似if (sample->depth && !renderd.RenderFrame(sample->depth)) break;这样的代码一共有5句。它们分别处理:depth(深度图像)、color(彩色图像)、ir(红外线图像)、right(右图像)、left(左图像)。
下面以深度图像为例,讲解:
第一个判断条件:有没有得到深度图片sample->depth。如果没有直接break,第二个判断条件不会执行。
第二个判断条件:RenderFrame()函数是UtilRender类中的一个方法,它用来显示传入的形参图片,并返回一个bool类型数据,如果成功显示,返回true,否则返回false。
那么对于深度图像sample->depth,伪码就应该是下面这样的。所以不执行break;
1
if ( true && ! true ) break ;
对于右图像sample->right,它的伪码是下面这样的(当前使用的是SR300)。所以也不执行break;
1
if ( false && ! false ) break ;
程序会正常的执行,图片会正常的显示。那么什么时候图片会不正常显示呢:当执行到break;,图片就不显示了。执行到break说明判断语句是if(true && !false)这样的状态。说明图片我们会得到了,但是在显示的时候失败了。
讲解完毕